Click on the "Download" button above to download the addon file.
The file "shatter_ai_v1_1.py" will be downloaded to your default downloads folder or the location you have set for online downloads.
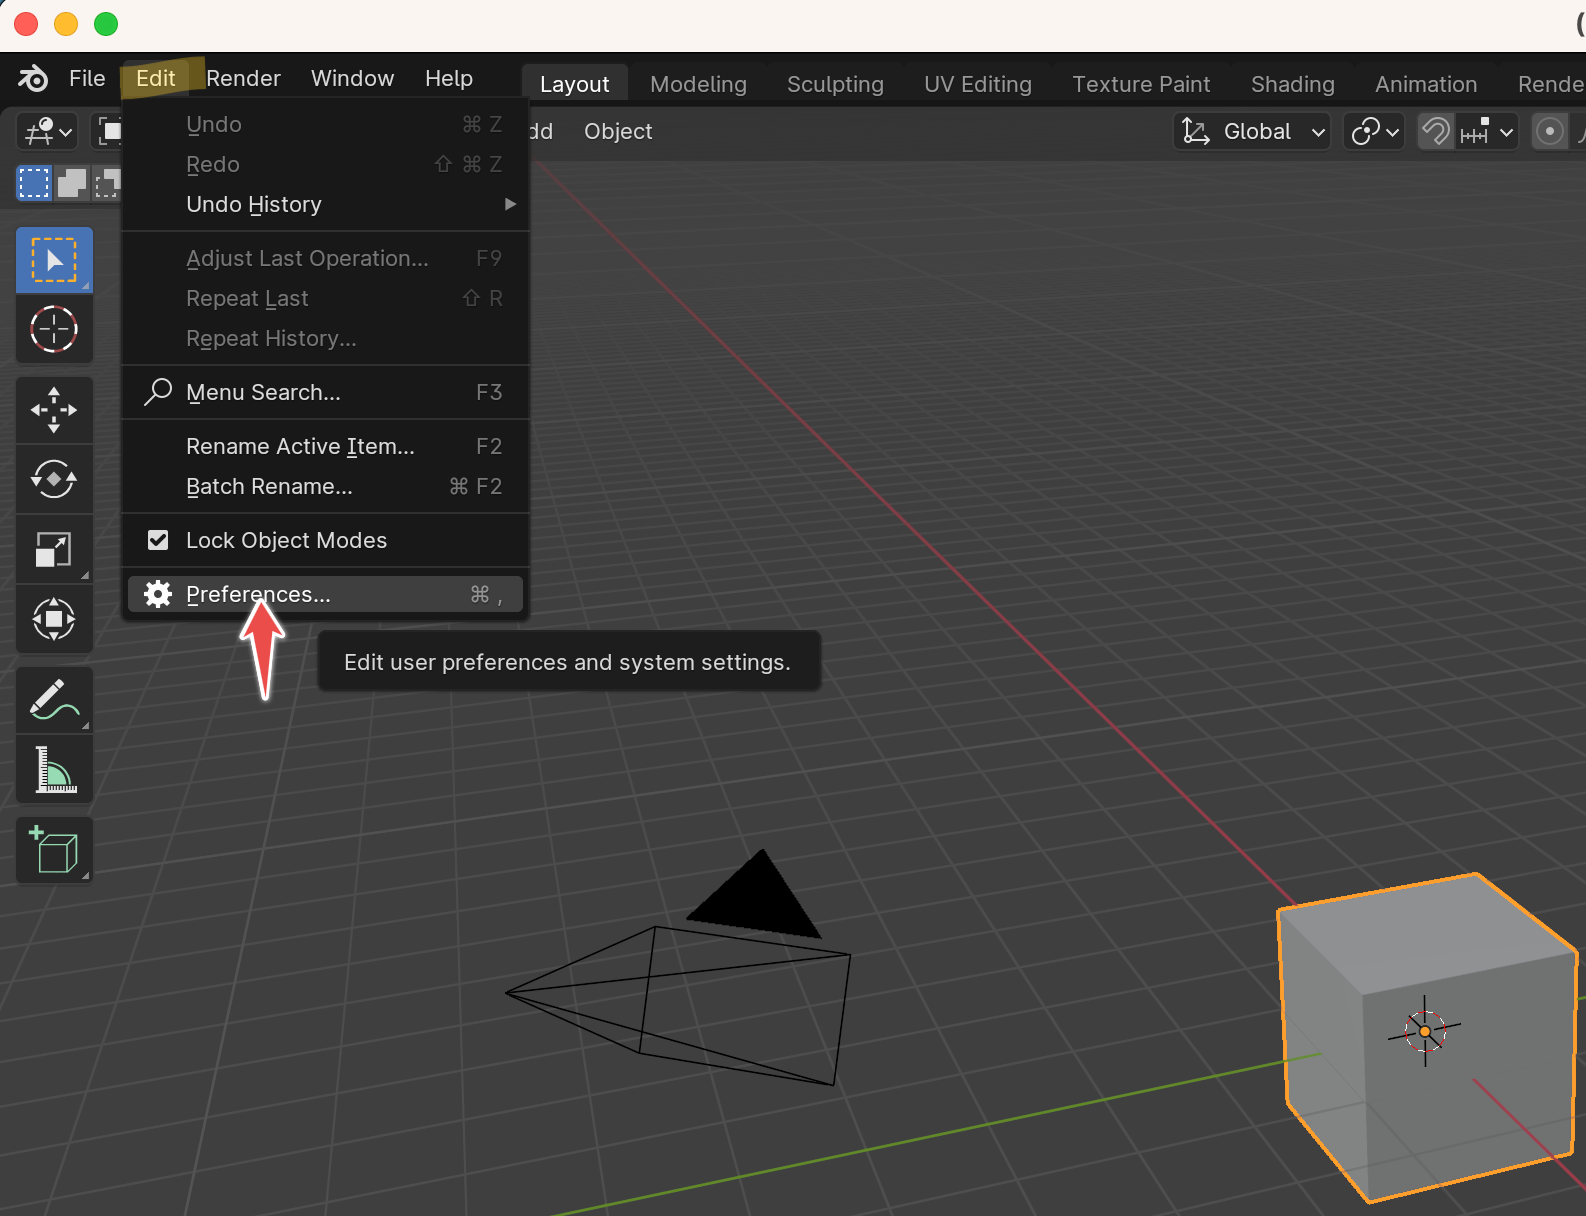
Open Blender and navigate to Edit > Preferences > Add-ons.
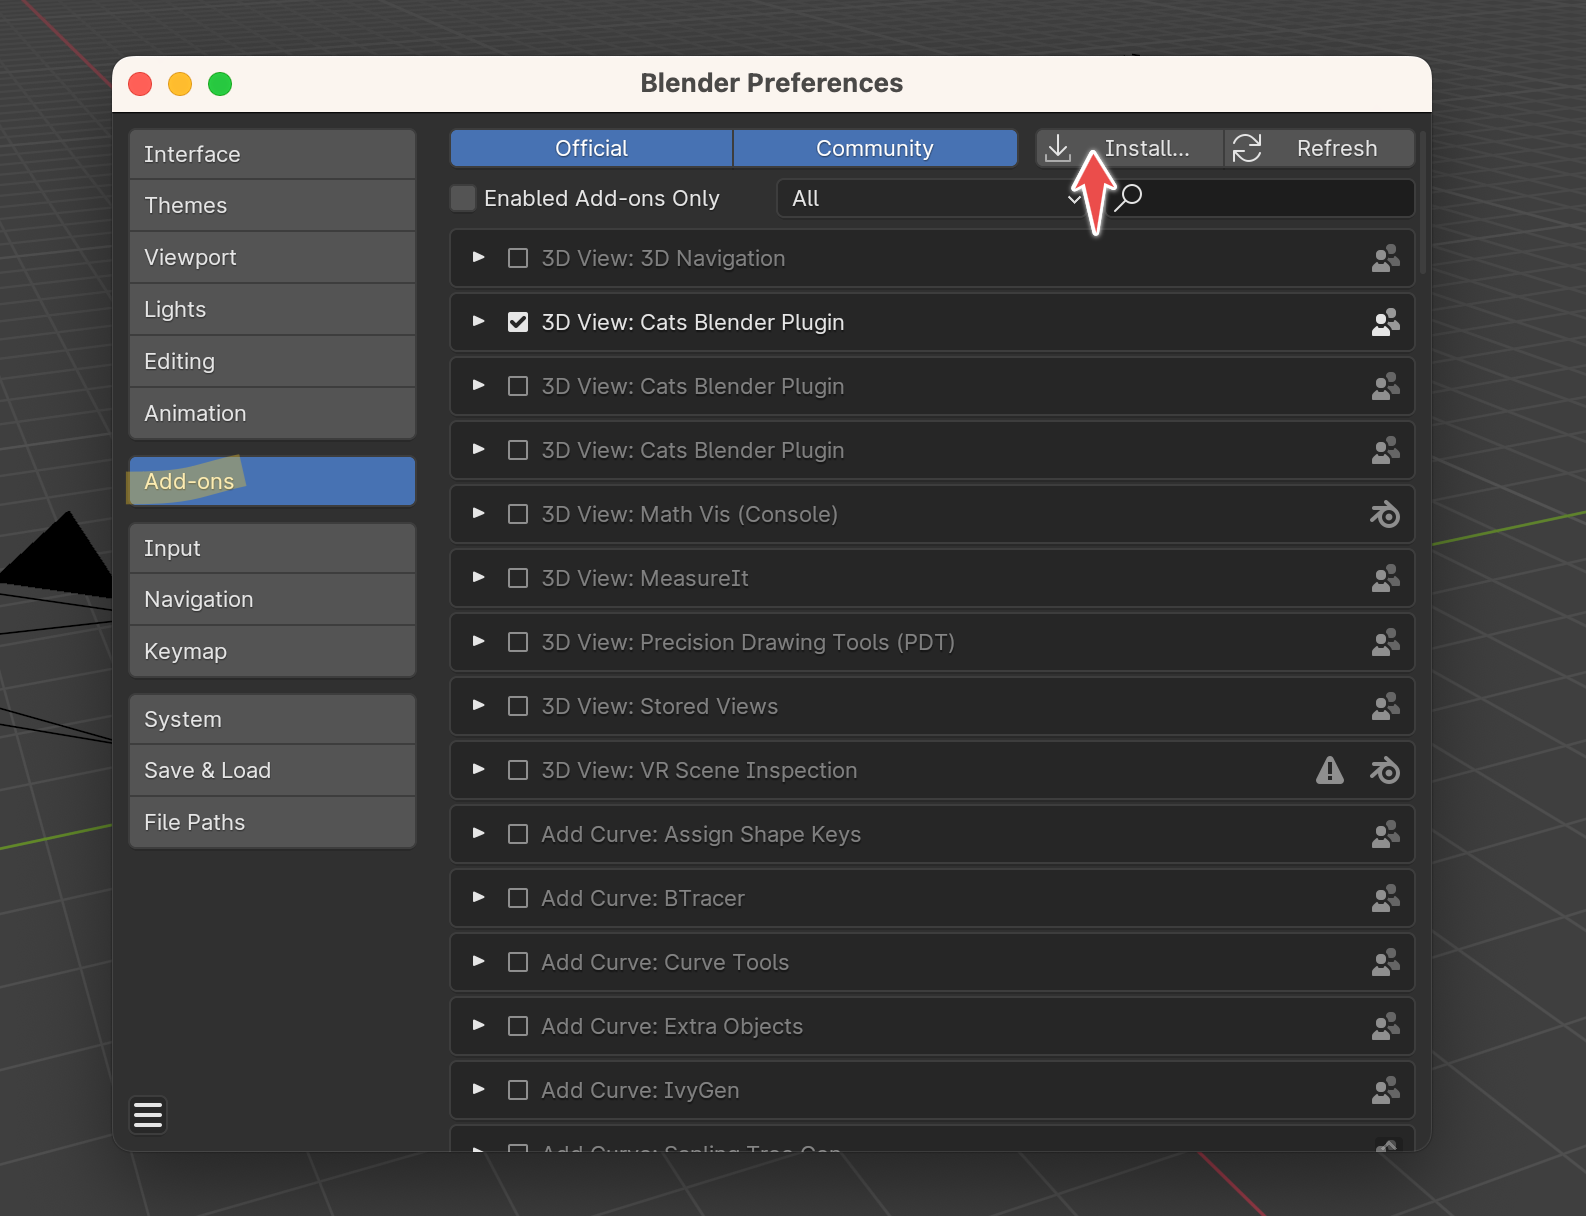
Click on the "Install..." button at the top of the Add-ons tab.
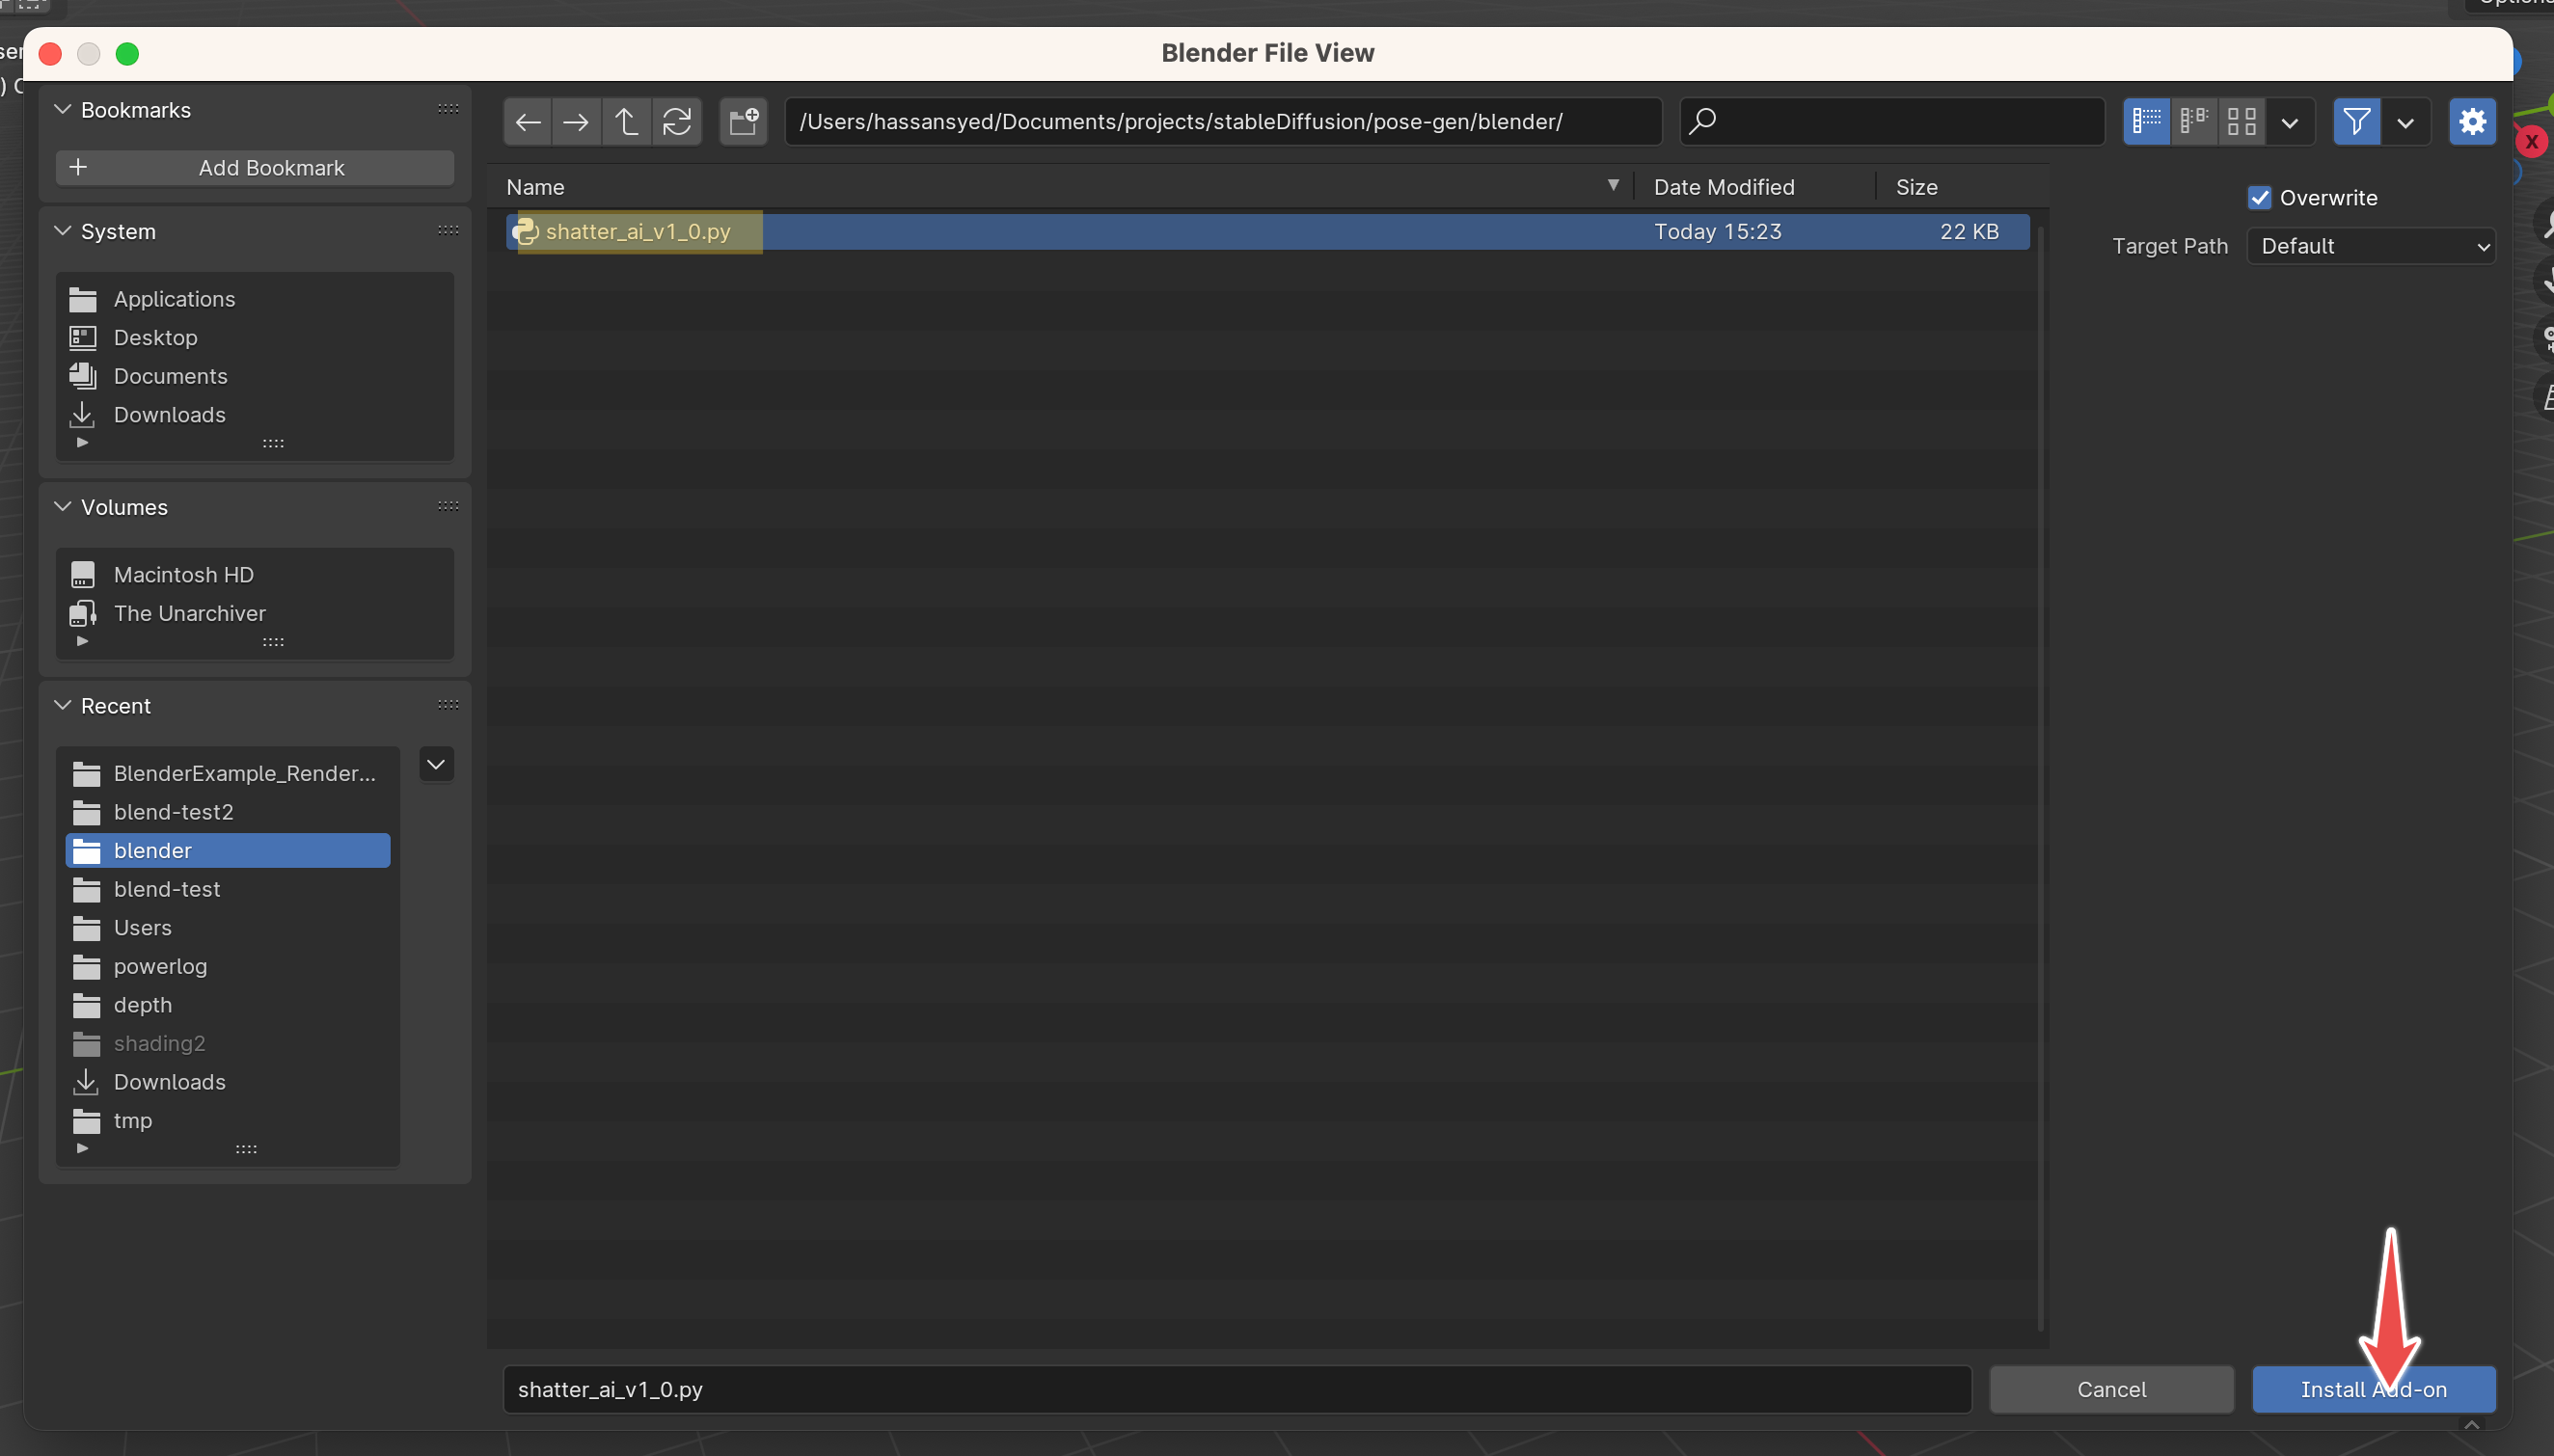
Navigate to the location where "shatter_ai_v1_0.py" was downloaded and select the file. Click on the "Install Add-on" button.
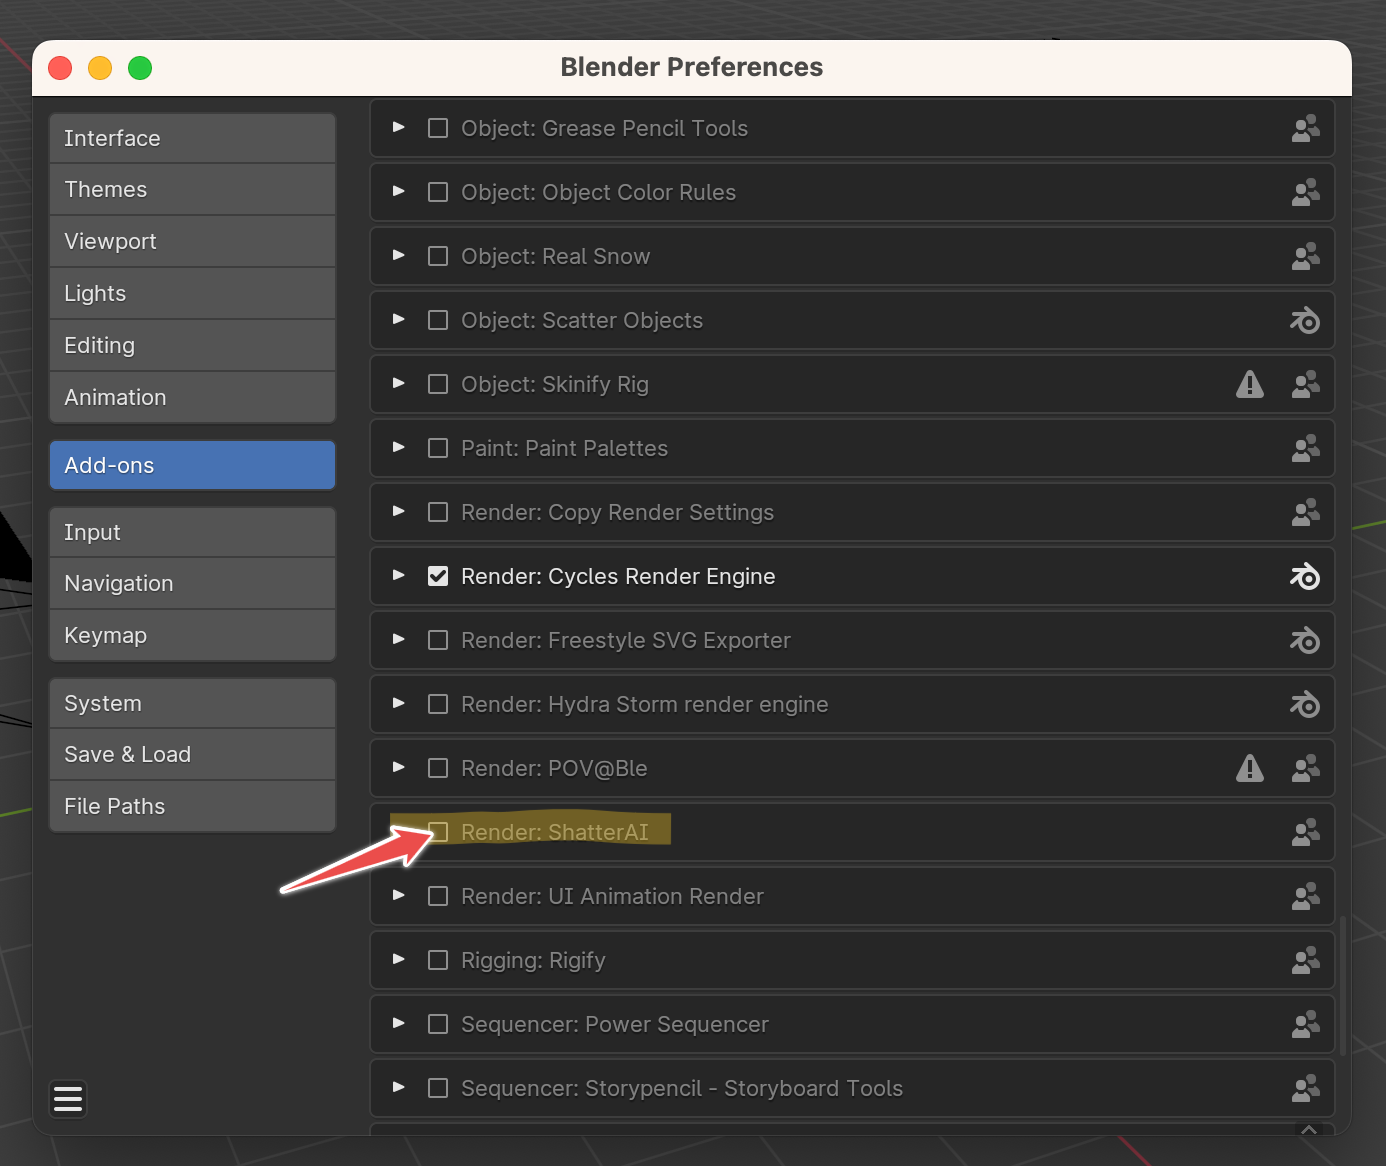
The addon should now be installed. Ensure it is enabled by checking the box next to it in the Add-ons list.
You will now be able to find the addon called "ShatterAI" in the tool shelf.
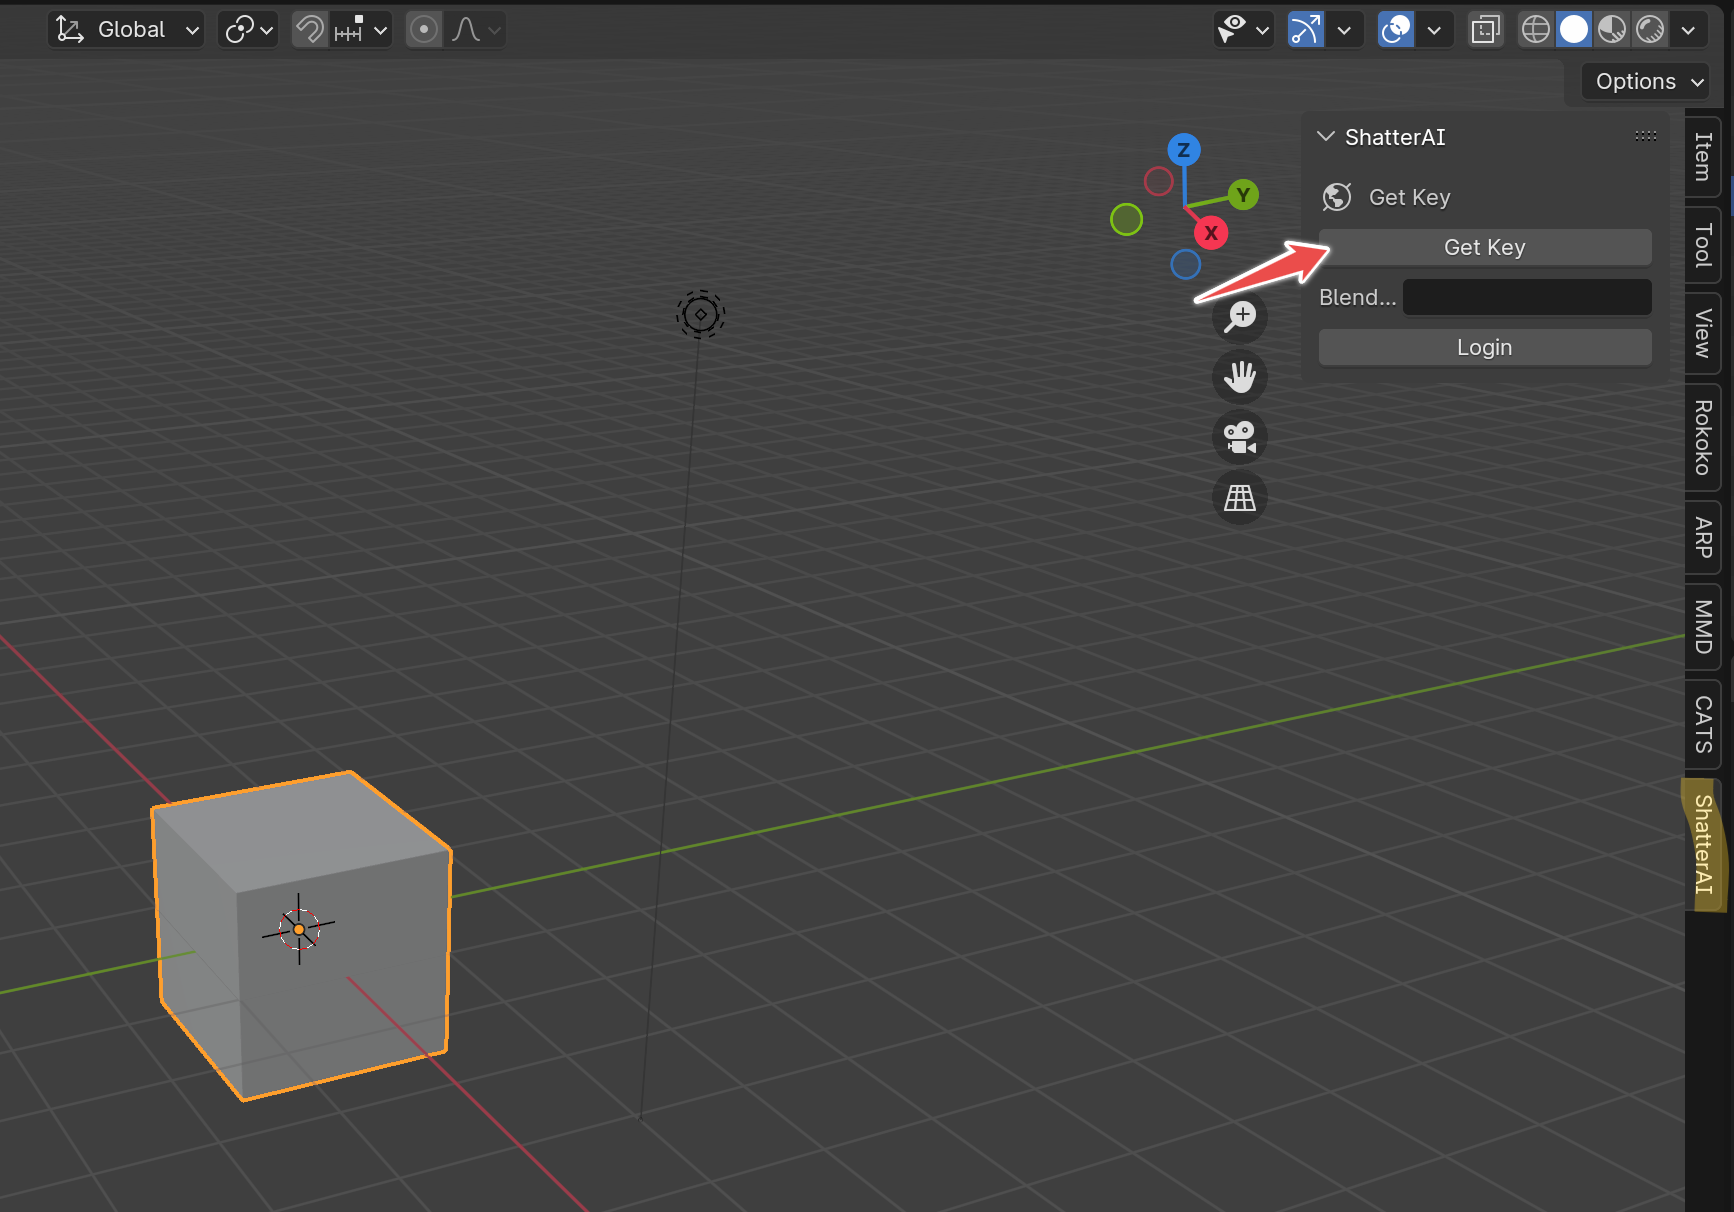
When first opened you will see a button called "Get Key", click it and you will be directed to ShatterAI.com/blender/key
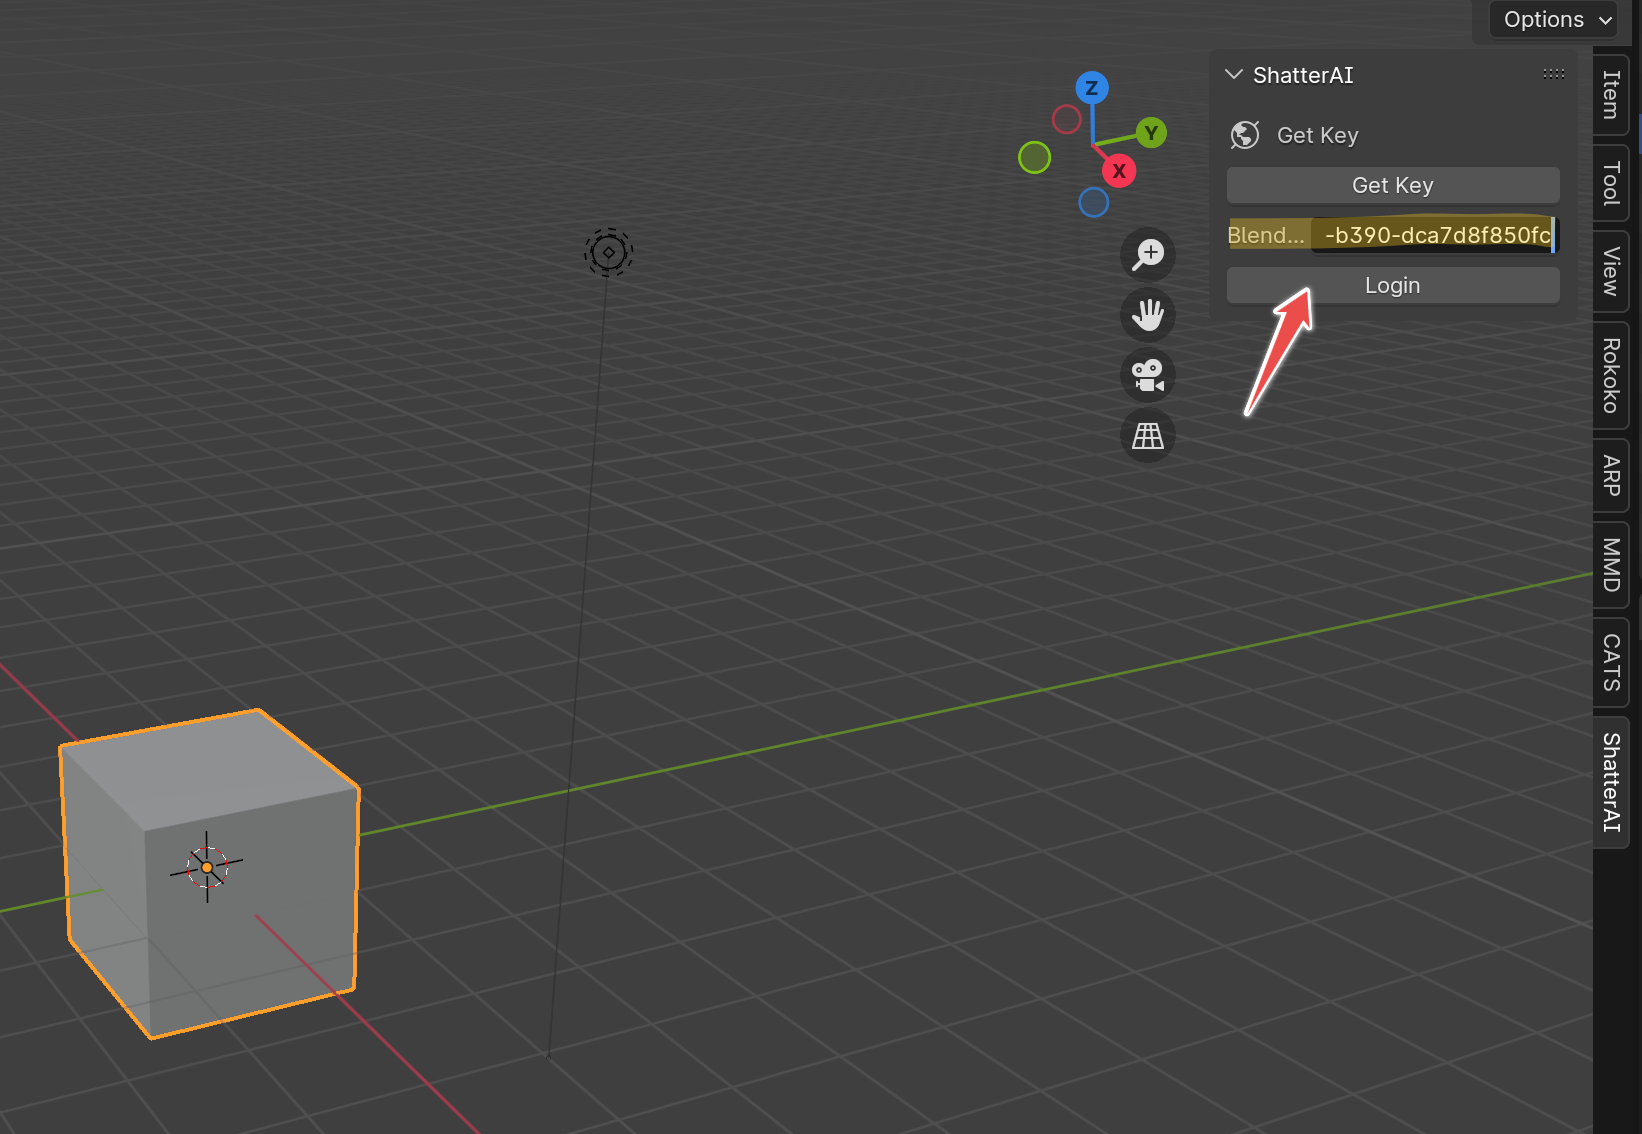
Copy and paste the key back into the blender add on text box and click login.
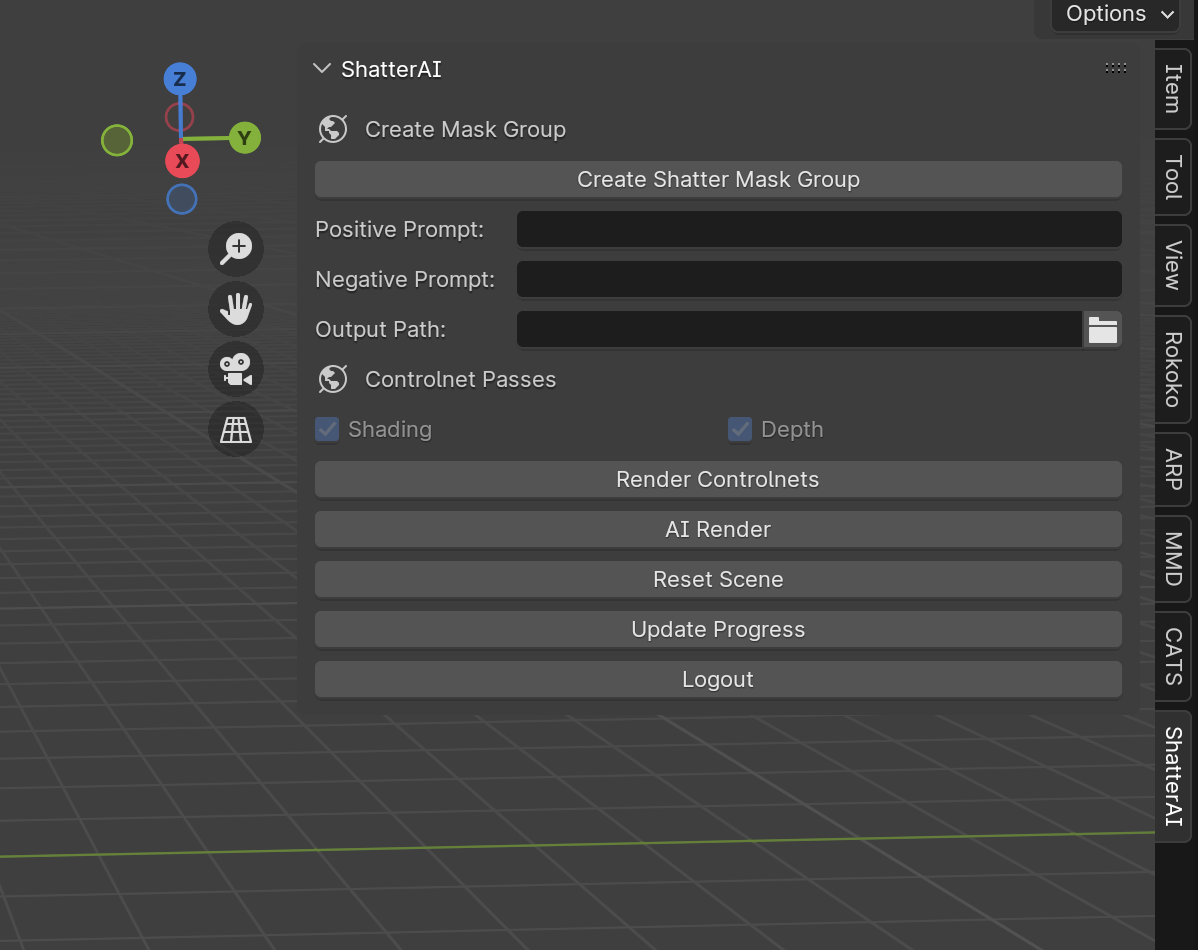
The addon should now expand to multiple text boxes and buttons. You have successfully installed the ShatterAI Blender Addon.
Usage Instructions:
Create your desired animation.
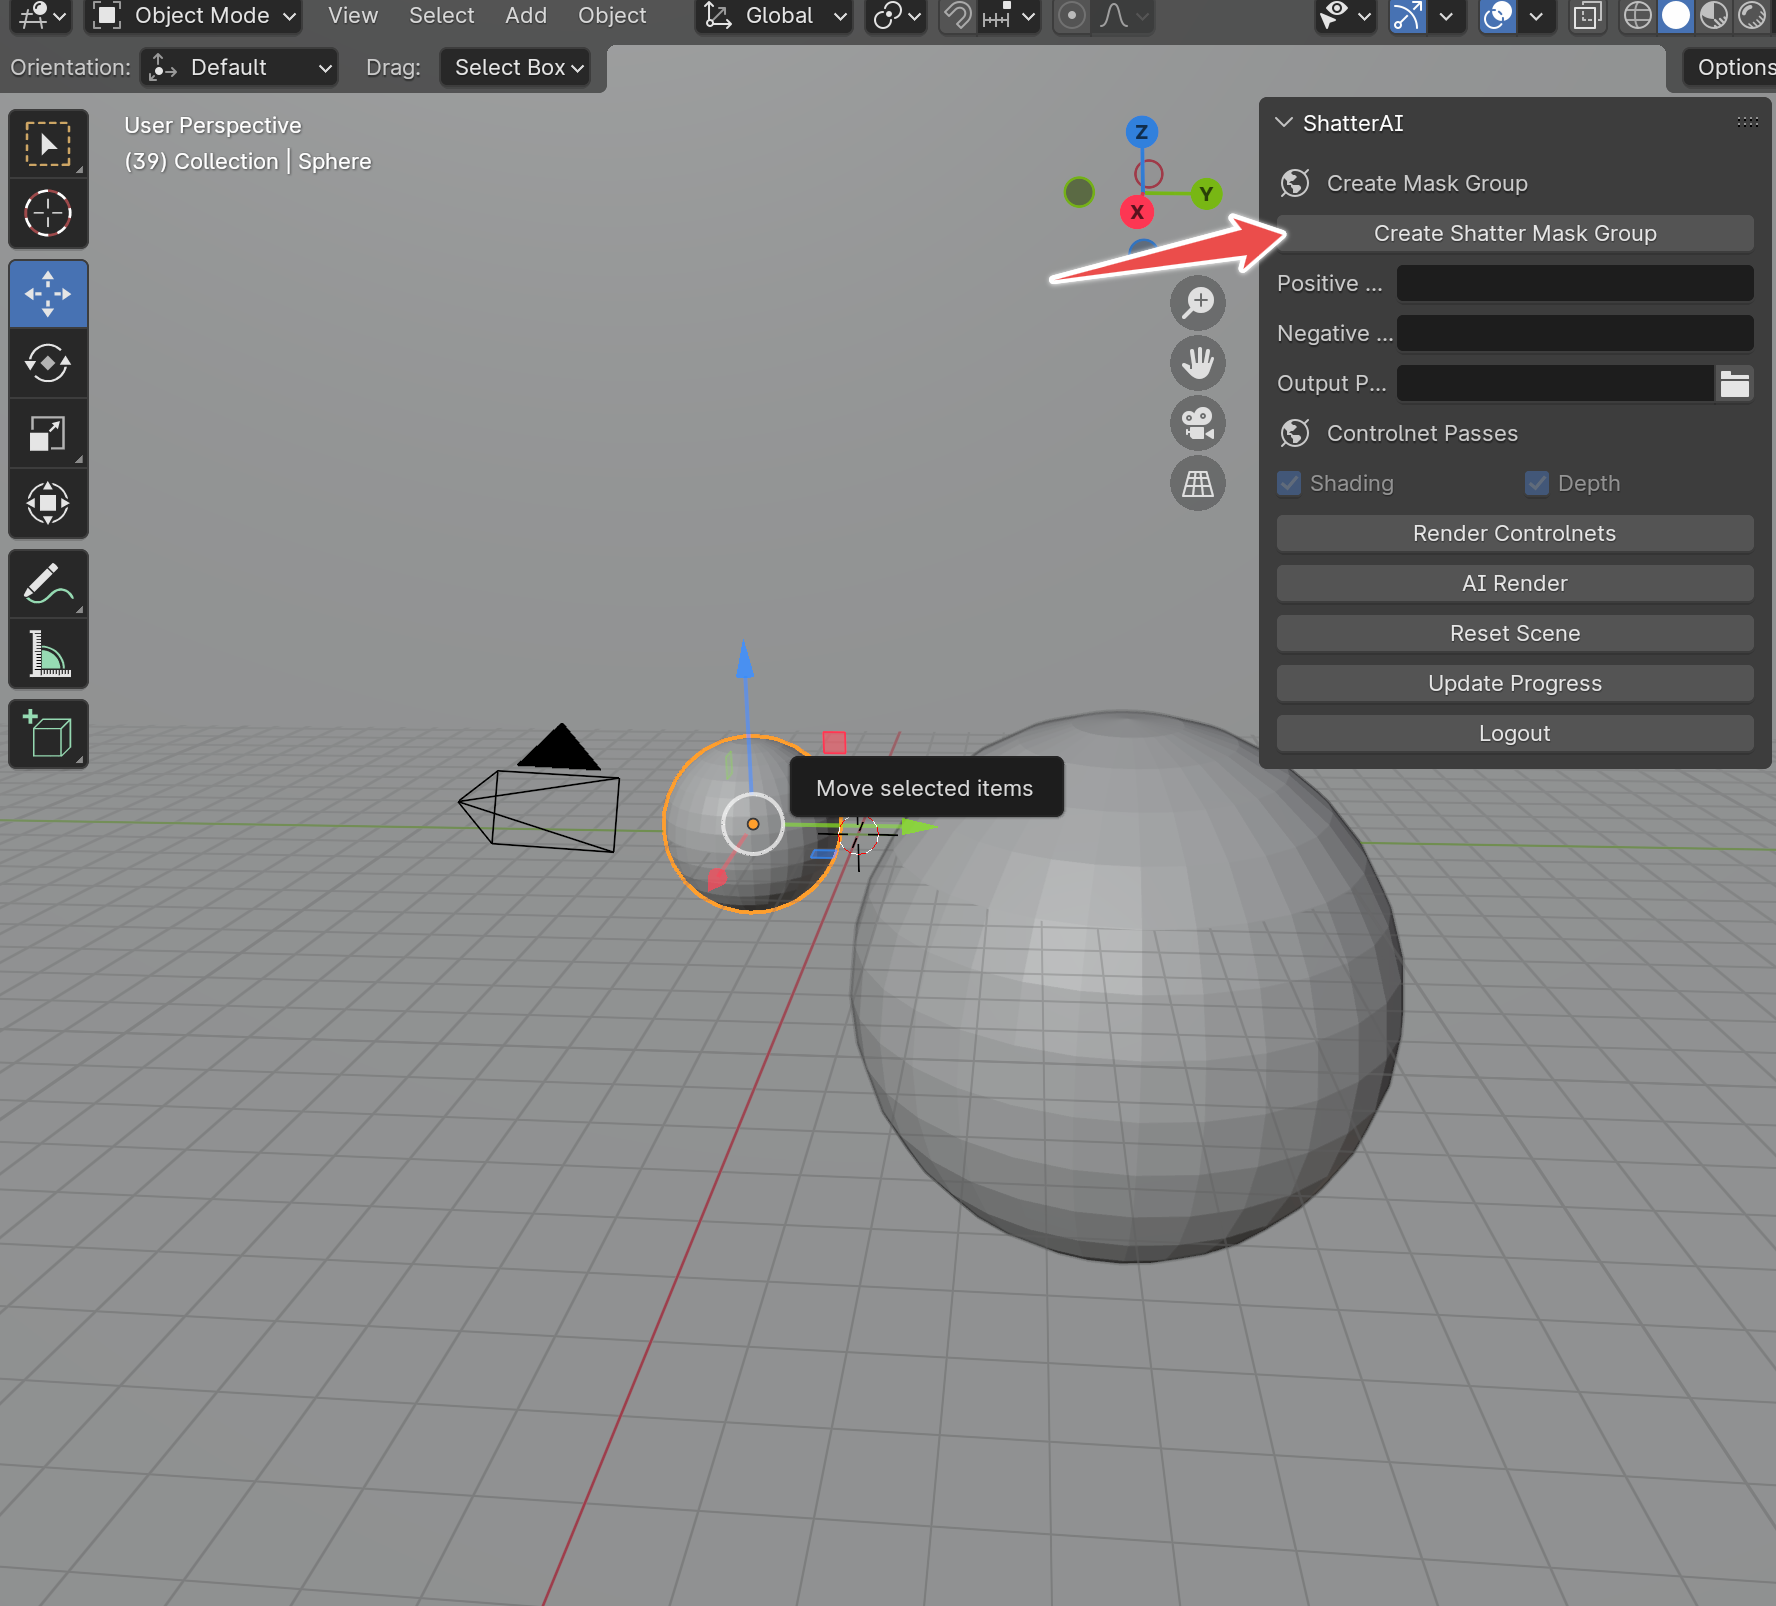
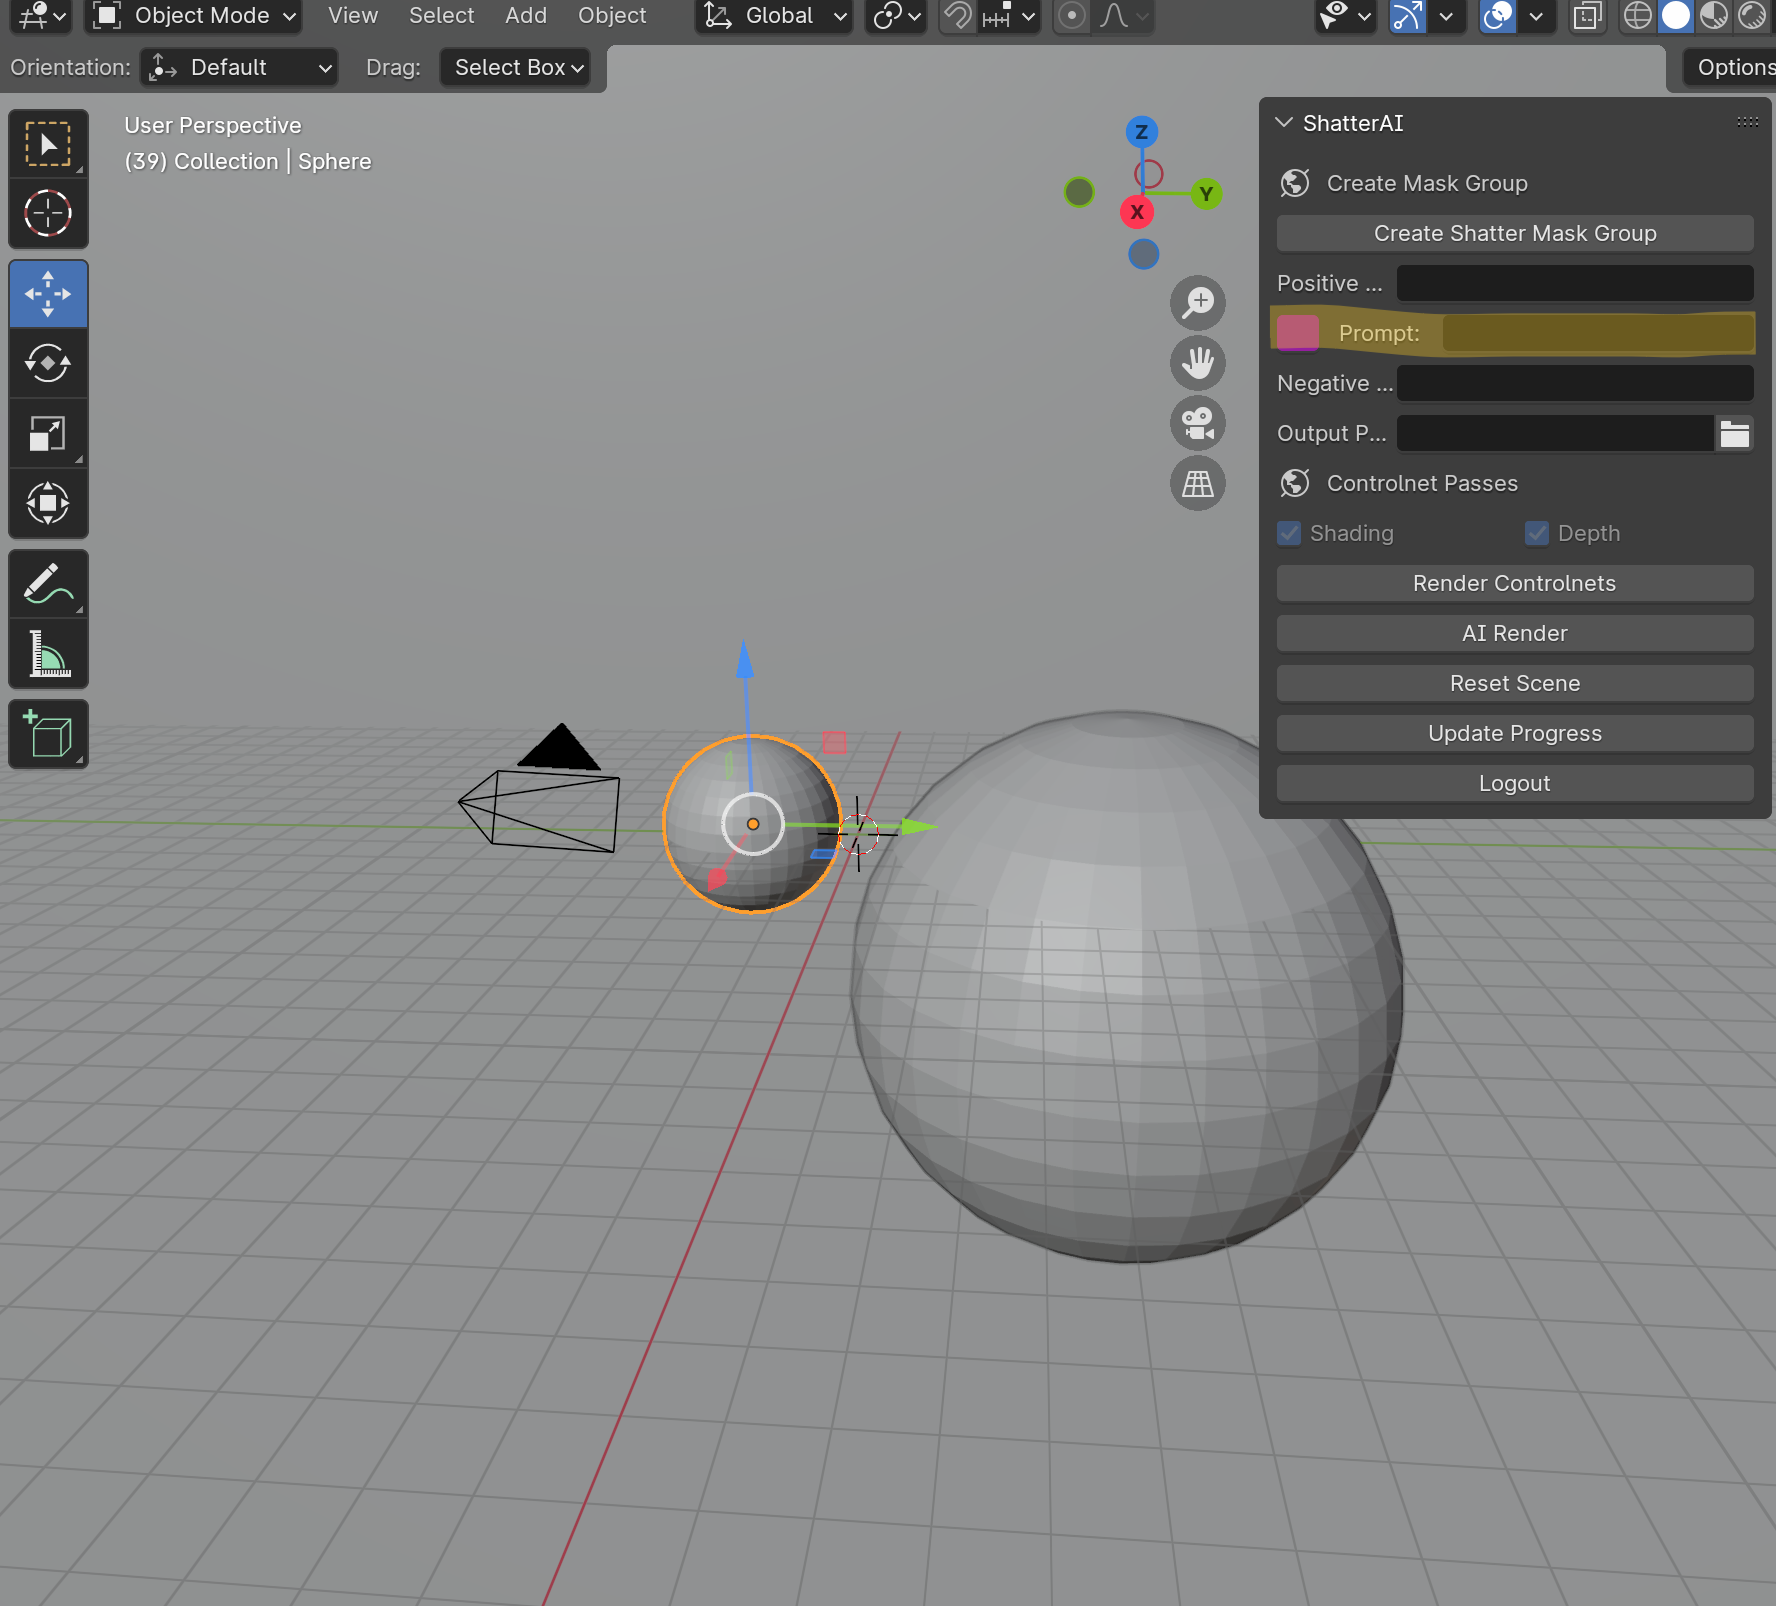
For each distinct part of your scene, select the relevant mesh or meshes and click "Create Shatter Mask Group" You should now see a colored square appear in the Shatter AI Panel
Repeat this process for all the meshes involved in your scene. For my scene, I will create 3 mask groups. One for the small sphere, one for the large sphere, and one for the background. As you can see, the Shatter AI panel, now has 3 colored squares. Please note that this add on only supports a max of 4 meshes at this time.
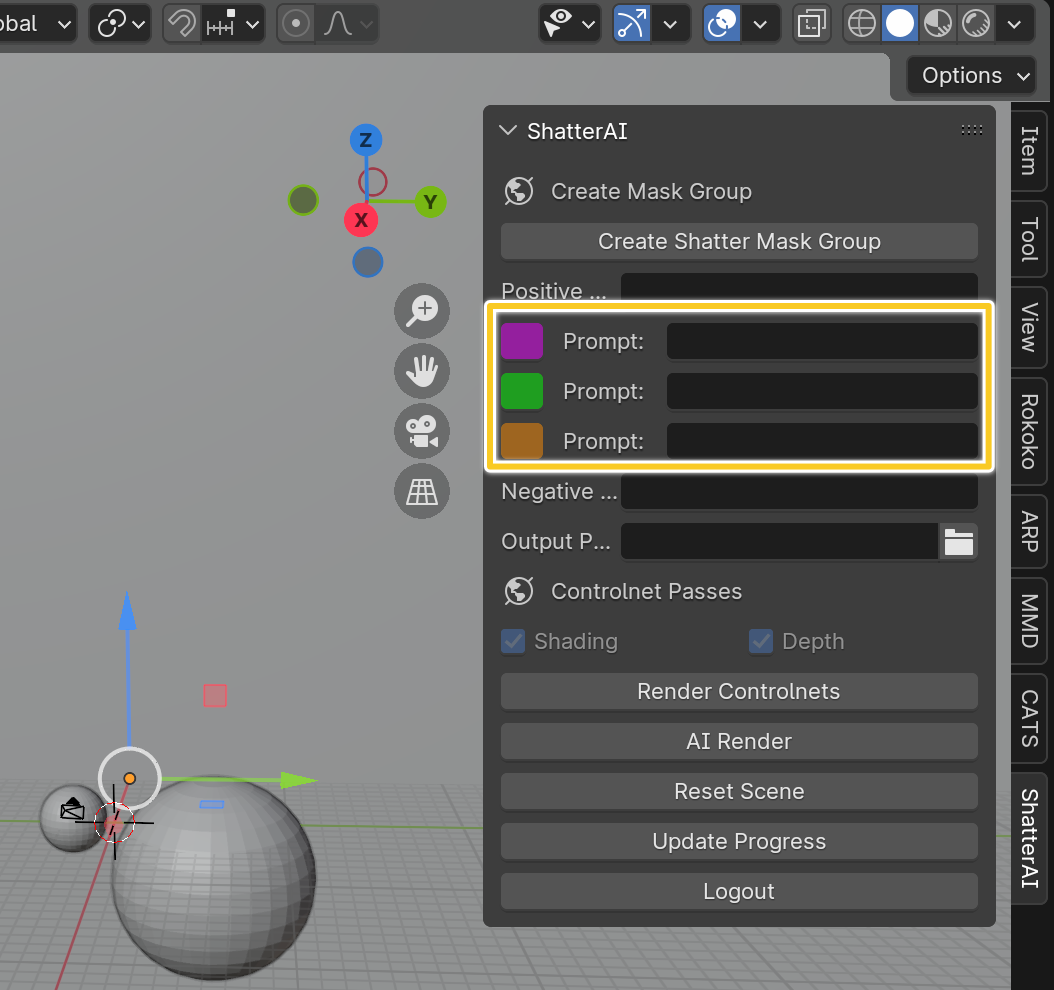
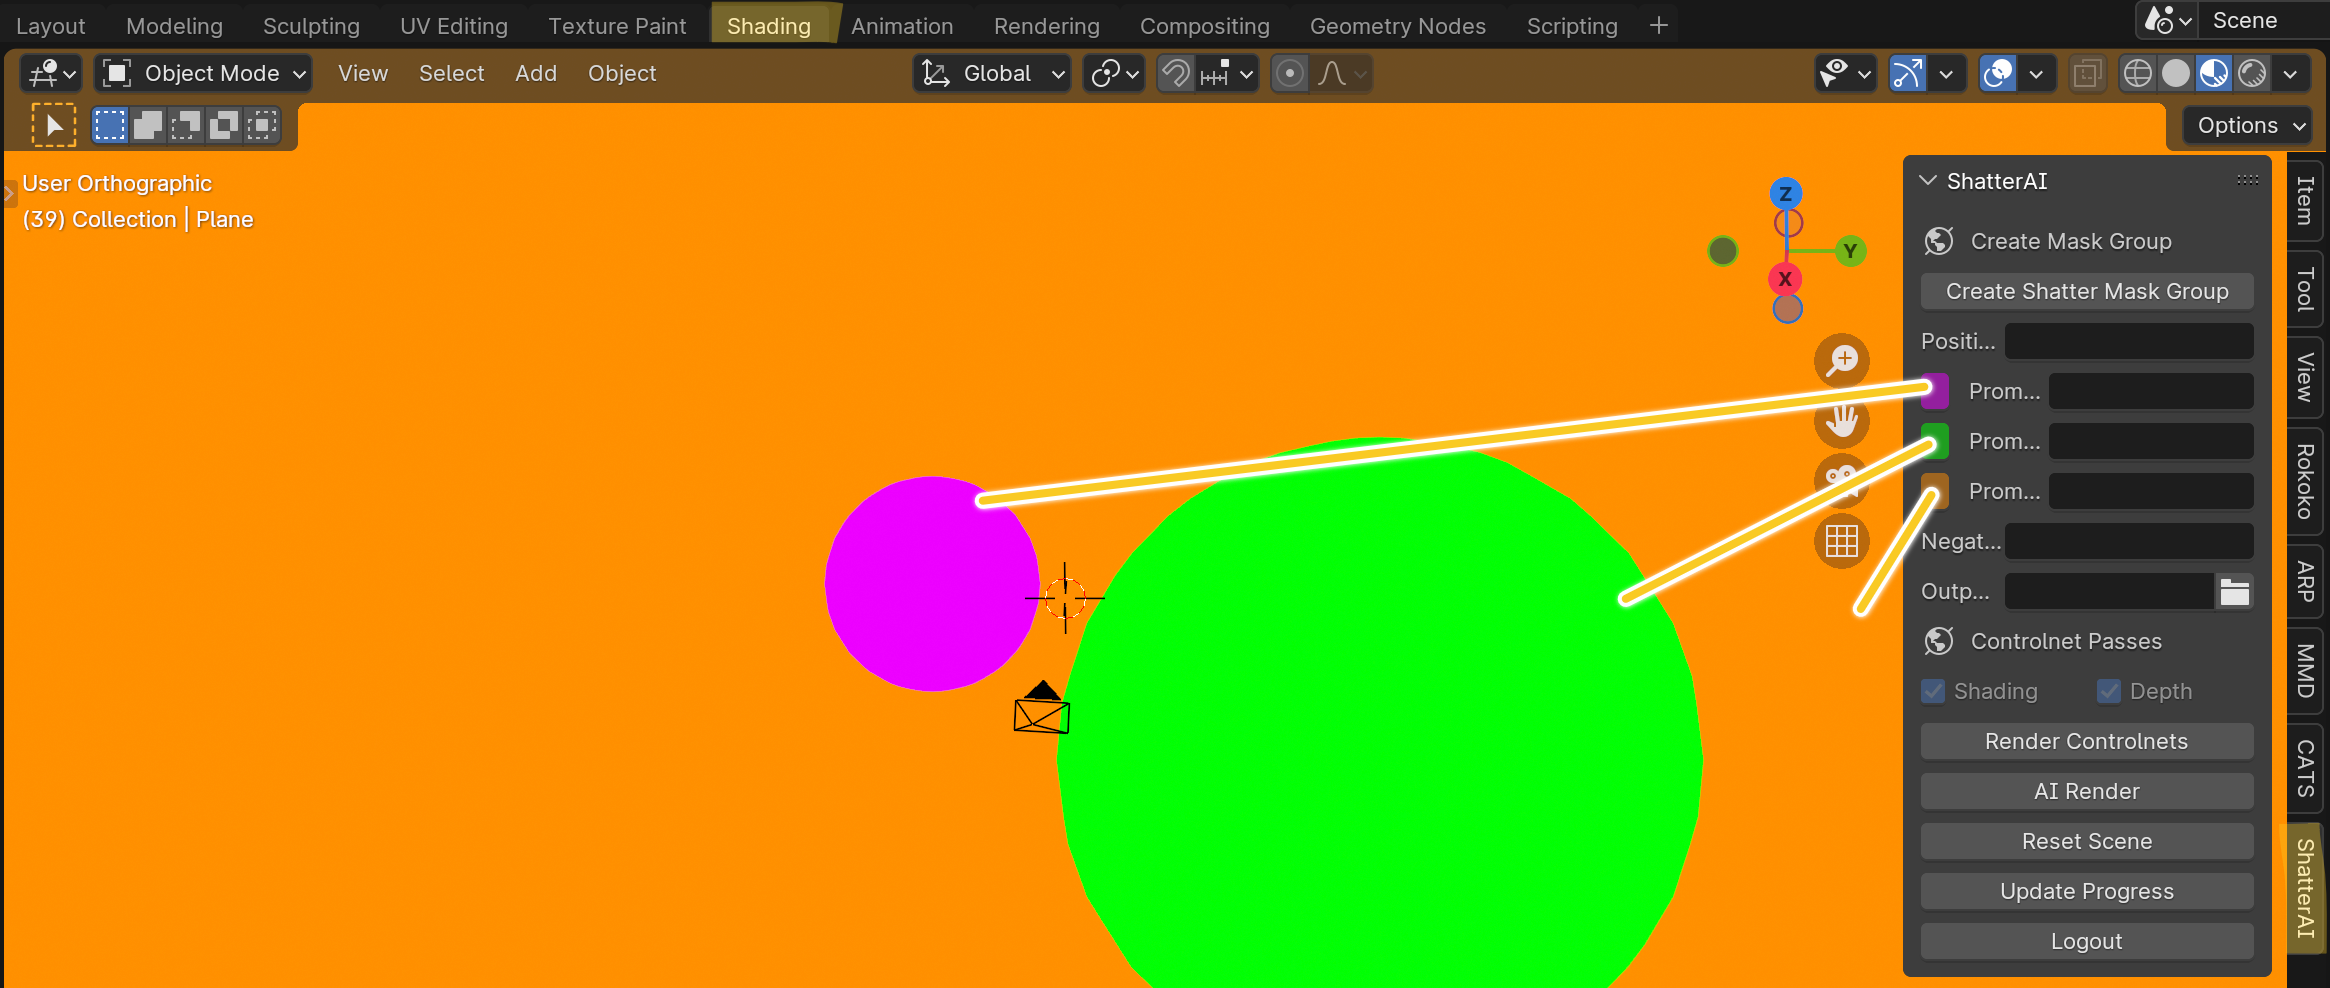
Navigate to the shading tab and re-open the Shatter AI panel. You should see that all the meshes are colored, and each colored mesh corresponds to a text box.
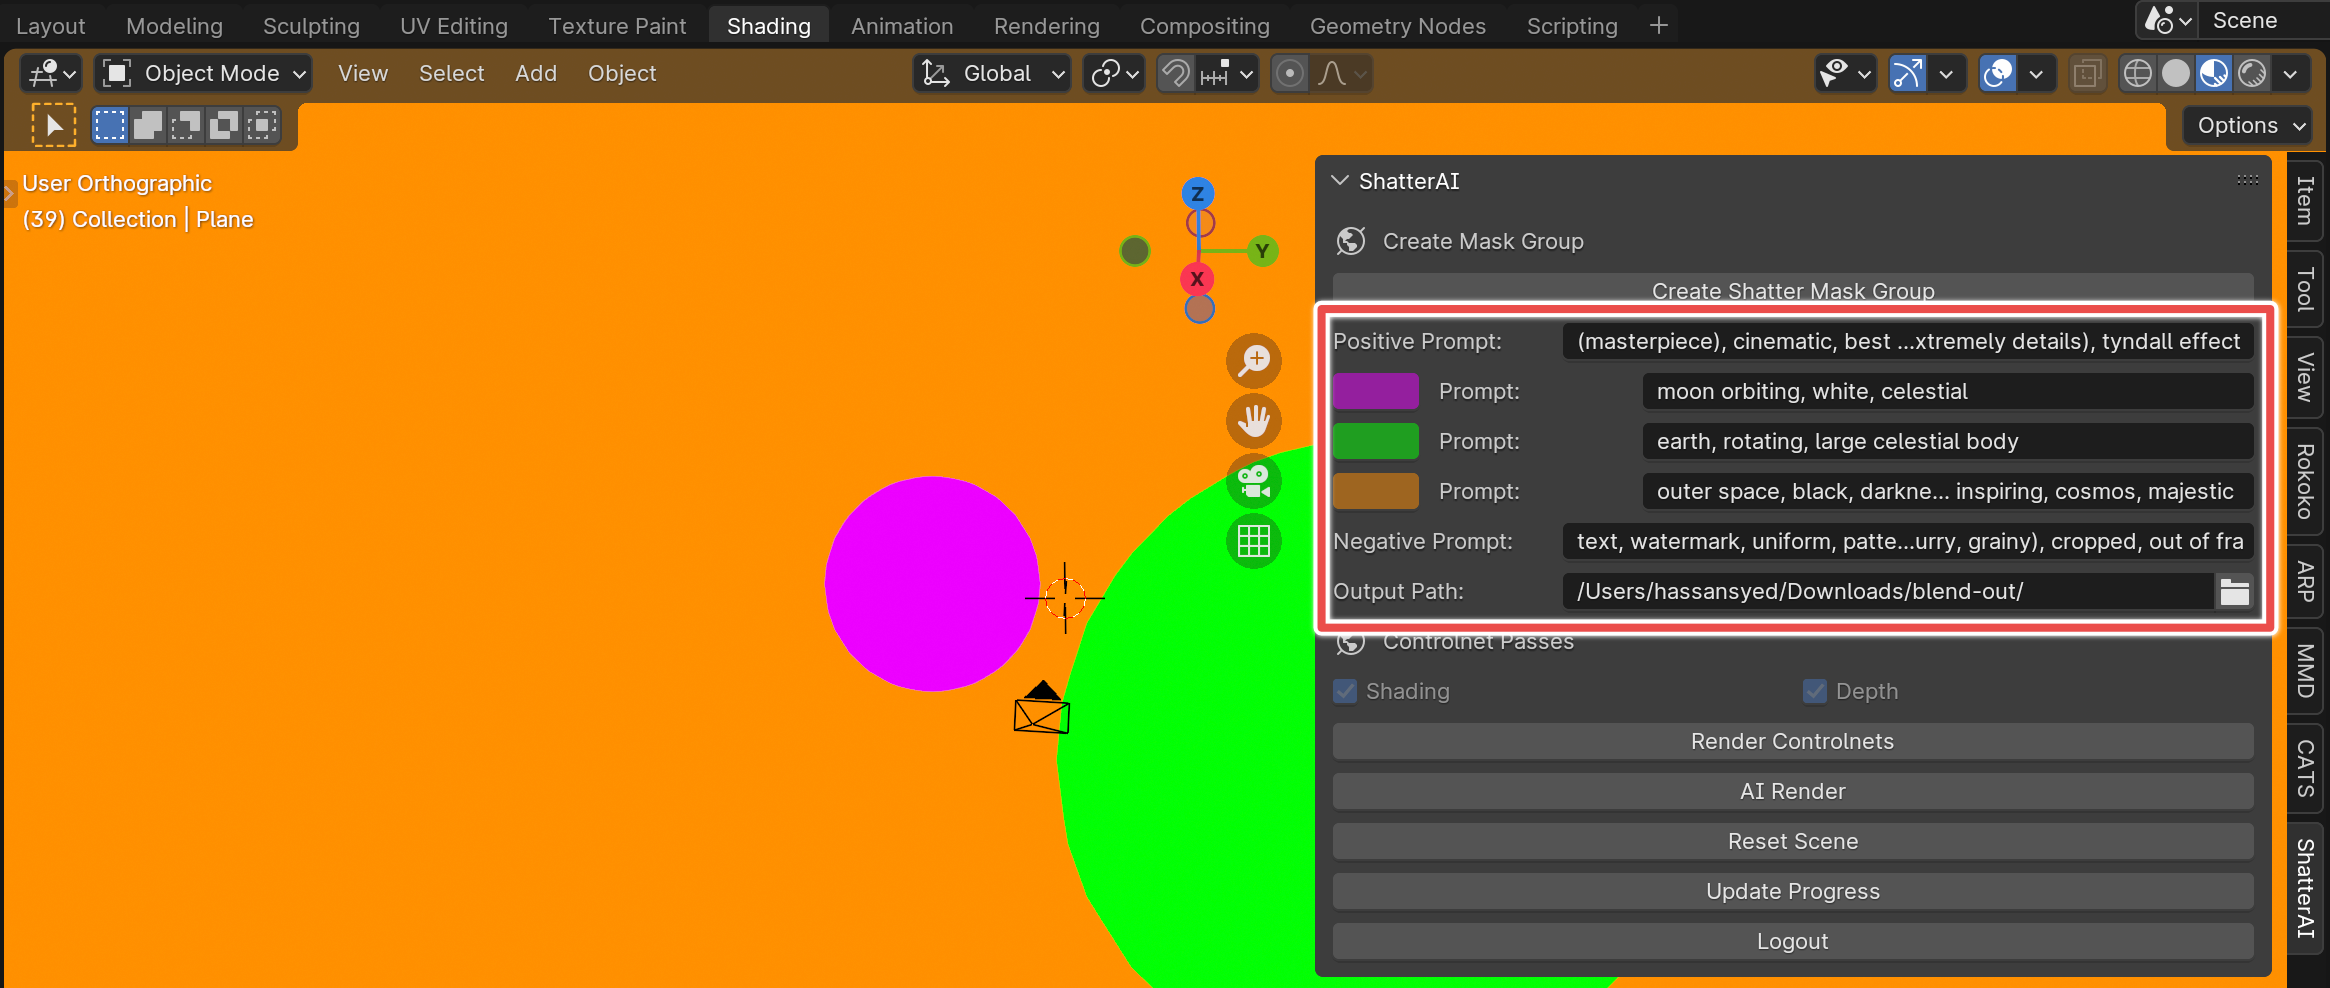
Fill in all the prompt fields. The Positive Prompt field is applied to each prompt. Putting things like "best quality" here is a good idea. For the positive prompt, I put: (masterpiece), cinematic, best quality, 8k, high detail, photography, (bokeh:1.1), dof, awe-inspiring, majestic, overwhelming, octane rendering, award winning, 35mm film movie still, ultra photorealistic, photorealism,taken with hasselblad H6D 100c, the HCD 24mm lens, sharp focus, (perfect real extremely details), tyndall effect The prompts next to a color correspond to that mesh color. Put what you want that mesh to turn into. For the purple mesh, I put: moon orbiting, white, celestial For the green mesh, I put: earth, rotating, large celestial body For the orange mesh, I put: outer space, black, darkness, stars twinkling, awe inspiring, cosmos, majestic The Negative Prompt field specifies what you don't want to see in the scene. Putting things like "watermark" is often a good idea. For the negative prompt, I put: text, watermark, uniform, patterns, underexposed, ugly, oversaturated, high contrast, jpeg, (worst quality, low quality, normal quality, lowres, low details, oversaturated, undersaturated, overexposed, underexposed, grayscale, bw, bad photo, photography, bad art:1.4), (font, username, error, logo, words, letters, digits, autograph, trademark, name:1.2), (blur, blurry, grainy), cropped, out of frame, cut off, jpeg artifacts, out of focus, glitch, duplicate, (amateur:1.3), merging, clipping
Now select an output directory by pressing the folder icon on the Output Path text entry box, this is where the render passes used for video generation will be written locally. Here is the panel fully filled out.
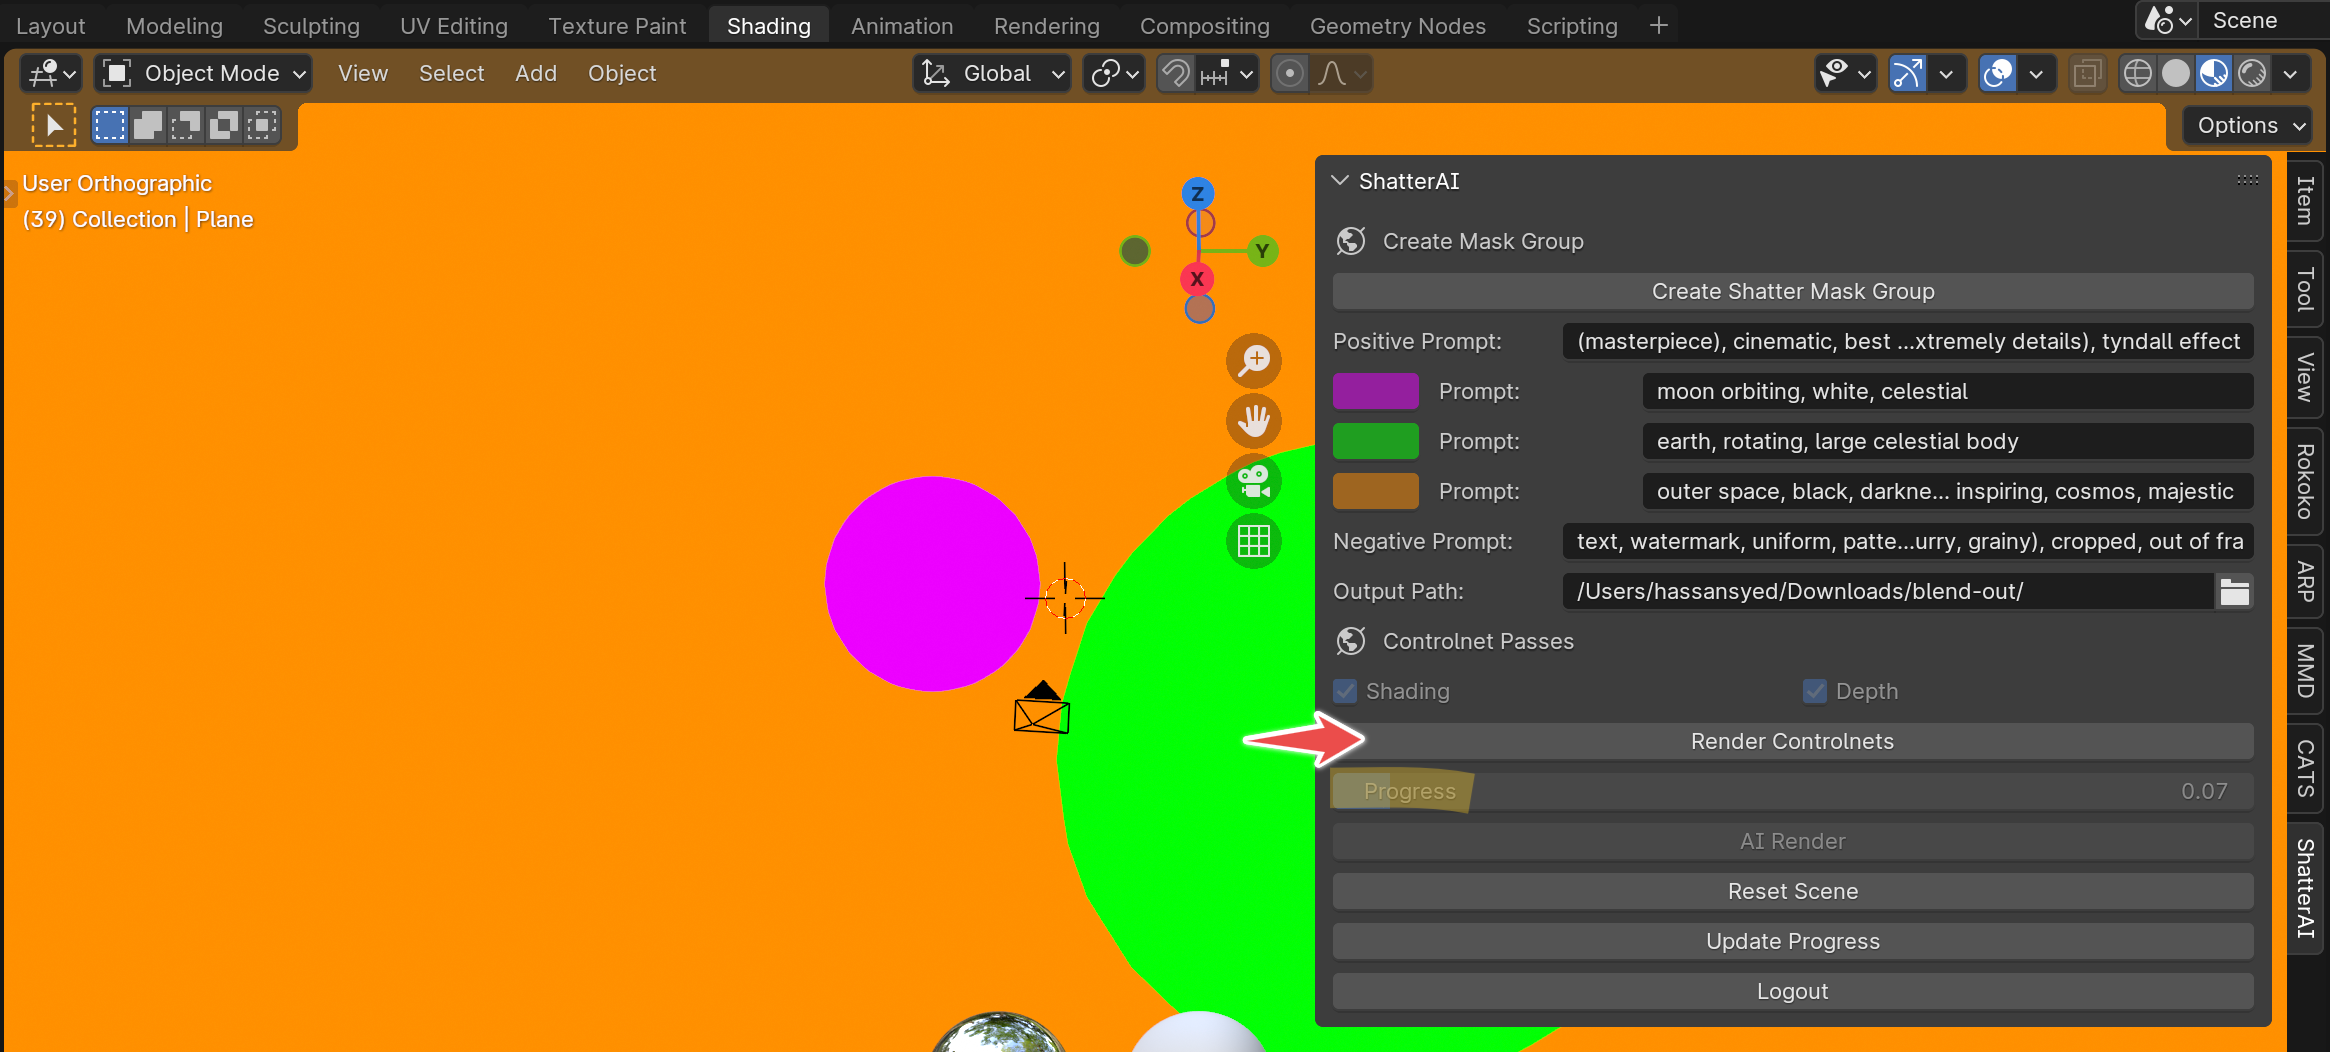
Now press "Render Controlnets" This will generate some additional renders the video generation will use. The files will be saved at the path you specified earlier. This can take a few minutes and a Progress Bar should appear
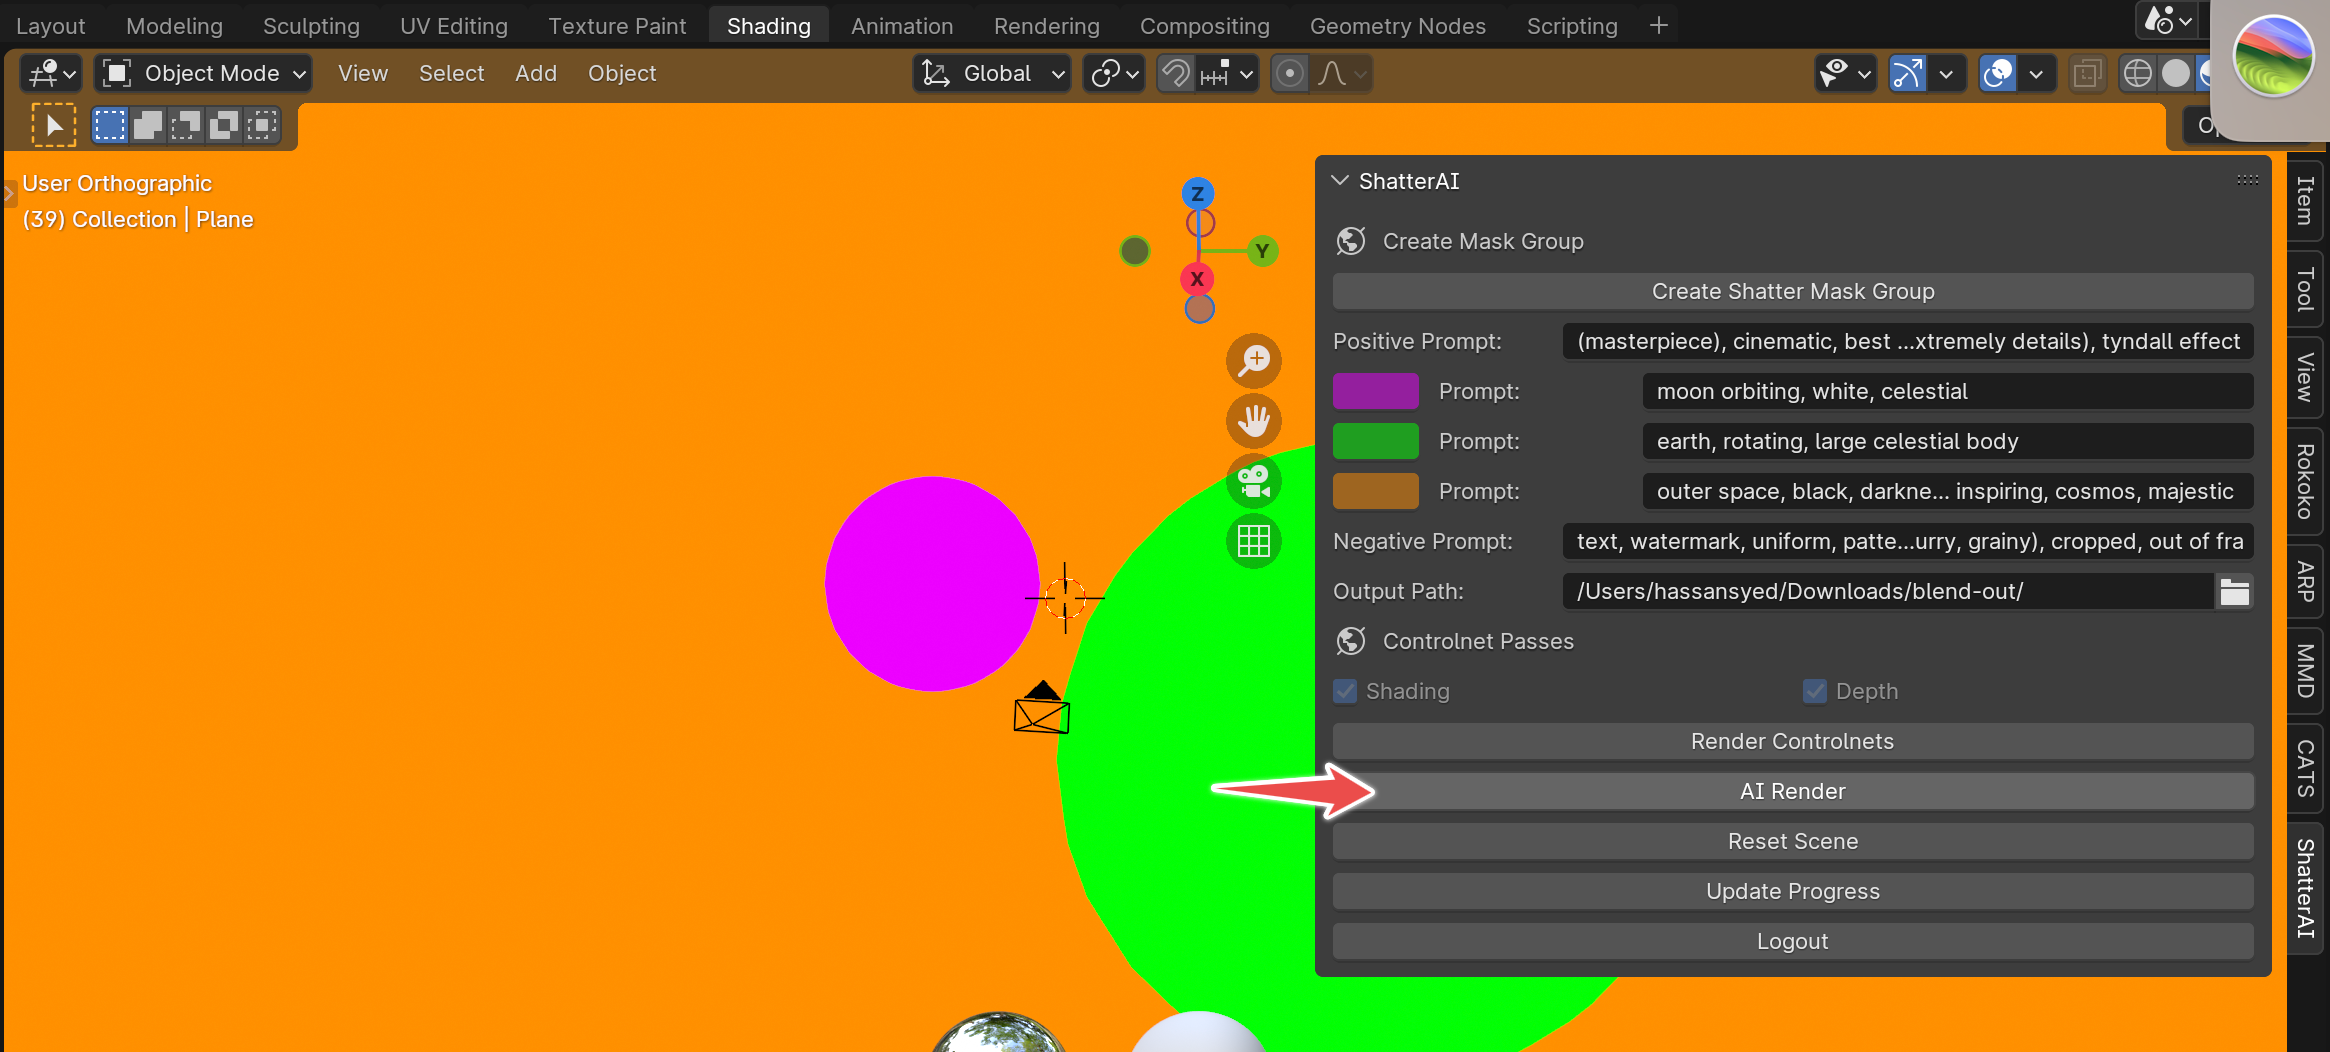
Once this step is done, the "AI Render" button should now be enabled. Pressing this button will kick off the video generation with your prompts and meshes. Let's click it! You should be redirected to ShatterAI.com Video generation will take a few minutes, depending on how long your animation is.
You should now end up with a video looking like this:
You will always be able to find your generated video at ShatterAI.com/profile You can adjust the prompts however you want. If you adjust the meshes, or the animation, be sure to render the controlnets again before starting the AI render.